Catheter Tipping Solutions
Other Services:
- Mold Design and Fabrication
- Process Development
- Sample Runs for Evaluation
- Validation Support
Catheters are formed by inserting tubing into a heated mold and after the melting, cooling cycles the material is removed with the formed final shape. Most applications use metal molds that are heated using RF induction or a conventional heating method. Catheter tip forming or bonding process may also use glass molds to form the catheter.
RF Induction heating is the fastest and most controllable process for forming or bonding catheter tips.

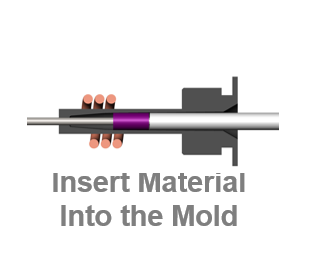
Insert the Tubing into the mold.
Some Tip forming processes are fairly manual where operator handles the forming process entirely by hand. The manual forming process can be inconsistent and cause many variations.
The more automated processes may use a gripper mechanism mounted onto a slide which will insert the tubing in much controlled manner and provide consistent process control.
At first, operator will load the catheter tubing into the mold and will apply gentle pressure to make sure the tubing is inside the mold before starting the process.
The tubing load position inside the mold should be the same all the time to prevent any short shots.
The mold desired temperature should be room temperature.
ONEX RF tippers offer dual start push buttons that meets the OSHA regulations.
If the process does not use a die temperature feed back, the cooling cycle must be kept long enough to prevent a residual heat build up on the die, which may start burning the material after several cycles.

Slide Delay or Mold Pre-Heat Time
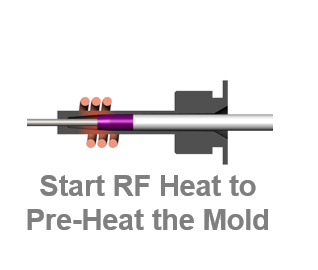
Once operator loads material into the die and starts the tipping process, the mold is preheated for a set time, which is defined as slide delay.
Basically the goal is to heat the mold to enough high temperature so that when the tubing is pressed into the mold, after the slide delay, the plastic starts melting as it contacts the inner surface of the heated mold.
The 2nd step has several critical factors for achieving good formed tips.
Slide Delay - If the tube is inserted while the die is cold the plastic tubing will collapse or buckle, which will produce reject parts.
Slide Speed - The slide forward motion should be adjusted so it moves the tube into the mold slowly. If the slide moves quicker then the material can melt the tubing will wrinkle or buckle. When the tubing buckles it looses the amount of force it needs to form the tubing.
Tube Grip Force - There are some materials that are slippery and the shape of gripper fingers and grip force are critical to prevent tube slipping while forming the tubing.
Tube Compression Force -

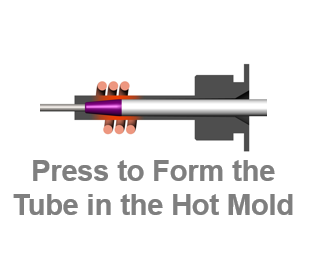
Press the tube into the mold.
After the die preheat slide delay the tube is being pressed into the mold.
The material starts melting and flowing into the mold cavity as the heat conducts from the mold to the material.
The material temperature must reach the Tg (Glass Transition Temperature), where it is soft enough to be shaped under the pressure applied by the air slide.
There are several factors that control the proper heating and flow of the material:
Coil number of turns - control how wide the heat zone is on the die. If the tip taper length is long it is important to have even heating across that length. In some cases where it's hard to make wide coils the heat will concentrate in one area and will cause burn marks.
Coil Diameter - should be properly matched with the mold diameter. If the diameter is big it will require more power to heat the mold. If the diameter is small the mold heat will increase the coil temperature and affect the RF impedance (create RF impedance mismatch).
Coil Position - controls the heat concentration on the die.
If the coil is closer to the distal end the material will flow forward more and cause flash.
If the coil is closer to the proximal end the material will flow back causing a ring-mark on the tubing before the taper.
Coil must be concentric with the mold. If it is shifted, it can cause the stress on the material and after forming the tip will be bent towards one side.
RF Power & Time - controls the entire forming cycle which depends on how long the process needs to flow the material and fill the mold cavity entirely. In many cases it is important to note that the process mast be balanced to prevent any bubbles or voids due to the process speed.

Cooling the Mold
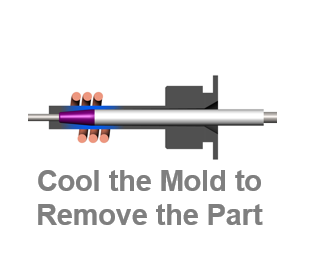
Once the forming cycle is complete the mold is cooled by air jet flowing directly onto the mold surface.
Higher the air flow the faster the mold will cool down.
It is important to note that higher air flow causes higher noise levels, which can be higher then the OSHA requirements.
Thus if the air flow rate is reduced, the cooling time must be increased.
The mold cooling is critical to prevent any material residue to get stock inside the mold if the material is removed while it's hot.
When black tots start appearing on the product surface that's a sign of dirty mold due to stock material.
Second most important factor is the residual heat build up if the die is not cooled down to the starting temperature.
ONEX RF Inc. is dedicated to giving you excellent service with quality results. Expect only excellence.
Copyright © 2020 ONEX RF . All rights reserved.Trademarks, including but not limited to ONEX RF Design are the trademarks or registered trademarks of ONEX RF and used under license by ONEX RF Based on mixed usage scenario.Terms of Use | Privacy Policy